This is the first blog entry in the our series called „inside performance“. Just enjoy and feel free to drop a feedback, critique or suggestions through the comment form beneath the entry. Enjoy!
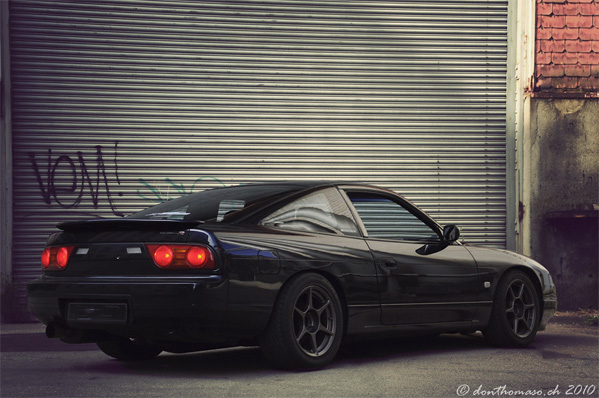
Commonly known, the S-chassis Nissans are immensely popular among the drift community. The relatively light body, FR turbo setup combined with low prices and great parts source (both used and aftermarket) makes the „S“ the perfect car to start drifting, attacking time or just having fun on and off the track. S13, S14 and S15 are the prevalent choices.
The S-chassis cars have quite a few different badges on them, such as 180SX, 200SX or 240SX. Depending on the country or continent they were sold, they feature different engines and also different differential setups. The main differential body stayed the same though, it is the inherently strong R200. The S-body cars were randomly (it seems) equipped with either a boring open differential or a VLSD (viscious limited slip diff) which in most of the cars is worn out due to high mileage or lack of service.
The stock open diff or worn out VLSD is a nice setup to start drifting and learn to cope with lack of sideways-acceleration and to get to know the physics of your car, how it acts when unstable. Especially the open diff is very soft and smooth to initiate and doesn’t let you spin out too much, so a great thing to start with.
After a few days, weeks or months of practise and improvement, you will develop a strong need to upgrade to a real LSD. Sliding around the track with only one wheel spinning can be fun, but will annoy you sooner or later. But definitely not later than when your buddies make jokes and pick on you all the time about you being a „one-wheel-smoker“…
The following pic cleary shows the effect of the party pooper called „open diff“ or „non-VLSD“
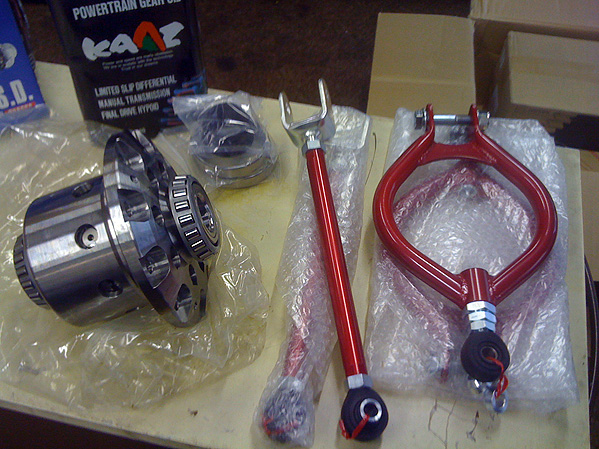
Now you need to get one of those nice LSDs that Speed Industries offers for the S-chassis cars (Kaaz, Cusco, ATS, Tomei..). This article does not aim to evaluate or compare the numerous LSDs aftermarket companies sell for the „S“, so let’s just stay on the „how-to“ topic. You basically just need to get one of those LSD kits that fit your requirements, a small workshop, a bit of wrenching experience and a nice friend to give you a hand.
We decided to go for the 2-way LSD kit, that KAAZ offers for the S13. Amazingly, all the necessary details are included, such as new bearings, cover gasket, gasket rings, diff oil. CAUTION: Make sure you order the correct diff kit for your „S“. The inner shafts for non-VLSD and VLSD are different. You need to specify this upon your order.
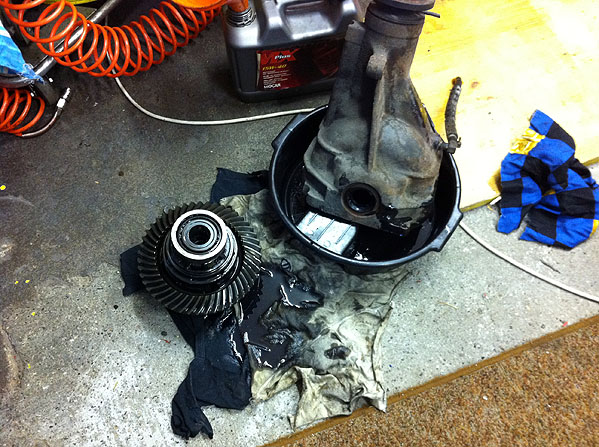
The diff comes out of the car quite handy. So you basically only need to detach the prop shaft, rear shafts, ABS (if existent) and sensor wires, oil radiator hoses and the four main bolts. It is a good idea to take the diff down together with your friend, since it is damn heavy.
The old buster on the bench, ready for its evolution:
Nissan equipped the differentials of its S-chassis cars with an awesome feature: A diff oil pump and radiator system, controlled by a temp switch and road speed signal of the ECU. It is actually a very wise idea to keep this stock setup, as especially when drifting, the oil can get reeeeally hot in there. Once the heavy bastard is out, check the working order of the oil pump. Connect the orange (or red) wire with the positive terminal of your battery to switch it on. I installed a switch in the cockpit, where you always can turn on and off the pump, e.g. if drifting.
Ok, now remove the aluminium cover.
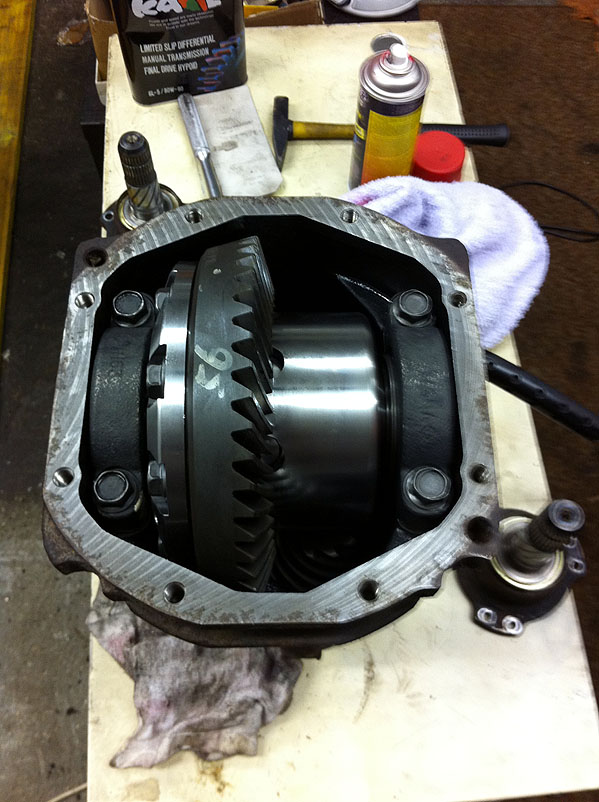
Next remove the two inner shafts from the diff. An internal spring holds them in place. You can lever them out with two big screwdrivers, make sure not to damage the cases. It is VERY IMPORTANT that you always keep the parts on their original side of the diff (left /right). NEVER EVER mess with this. Now you are ready to take off the two bearing shells that hold down the diff. There is an alignment ring on each side that you need to place exactly a the same position afterwards, so take care.
Now take out that old fucker and let it drain.
The ring gear now needs to be removed. Nissan does not tell you to replace the bolts there, but I did. In my opinion it is a small price for safety, because those seem to be extension bolts. And you don’t want one of them to come off, while your boostin’…
Take the new diff and mount the ring gear. The ring gear will sit very tightly on the diff, so you will want to heat the gear up a bit before you slide it onto the new diff, to make sure it sits properly. Now torque the new bolts to factory specs. It is recommended to use bolt lock (e.g. Loctite), to make sure they stay where they are.
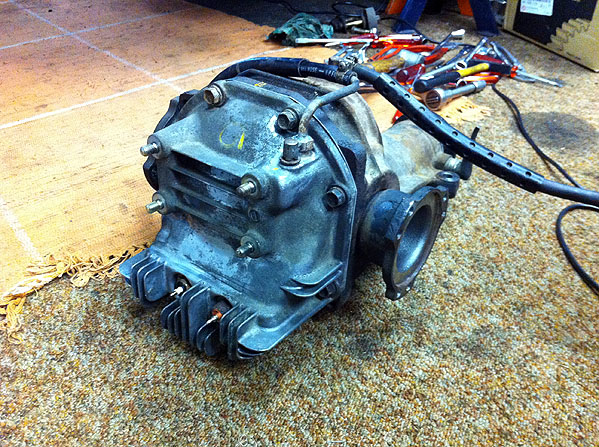
The diff can now go back in the casing. Make sure you assemble everything the same way backwards, as you disassembled it. The R200 normally does not need to be aligned, I haven’t heard of any one who had problems. This is a nice thing, because it saves you alot of time.
Mount the cover with the new gasket and already fill it up with the new fluid. I also put on new oil hoses once the diff was out, they seemed to be quite brittle after 17 years. The diff is now ready to be installed back in the car. Don’t forget to follow the provided brake-in instructions and replace the diff fluid afterwards.
Always a good thing is to upgrade other parts of the rear, while things are apart anyways. I decided to remove the whole rear end and replace the old main rubber bushings with PU ones. If intense drifting is the purpose, it is also recommended to get a „4-arm-kit“ to adjust camber and toe. All the necessary parts and support are of course offered by Speed Industries, just send an email or give us a call.
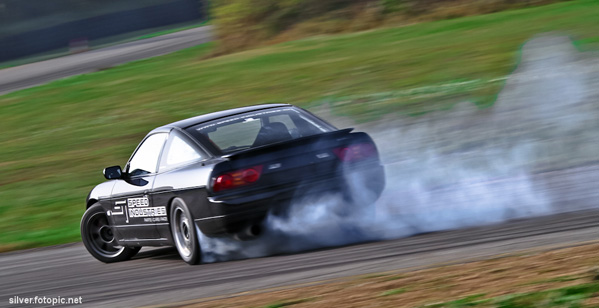
… and this is the way the S13 performs with the proper LSD installed:
cheers – Chris
Commonly known, the S-chassis Nissans are immensely popular among the drift community. The relatively light body, FR turbo setup combined with low prices and great parts source (both used and aftermarket) makes the „S“ the perfect car to start drifting, attacking time or just having fun on and off the track. S13, S14 and S15 are the prevalent choices.
The S-chassis cars have quite a few different badges on them, such as 180SX, 200SX or 240SX. Depending on the country or continent they were sold, they feature different engines and also different differential setups. The main differential body stayed the same though, it is the inherently strong R200. The S-body cars were randomly (it seems) equipped with either a boring open differential or a VLSD (viscious limited slip diff) which in most of the cars is worn out due to high mileage or lack of service.
The stock open diff or worn out VLSD is a nice setup to start drifting and learn to cope with lack of sideways-acceleration and to get to know the physics of your car, how it acts when unstable. Especially the open diff is very soft and smooth to initiate and doesn’t let you spin out too much, so a great thing to start with.
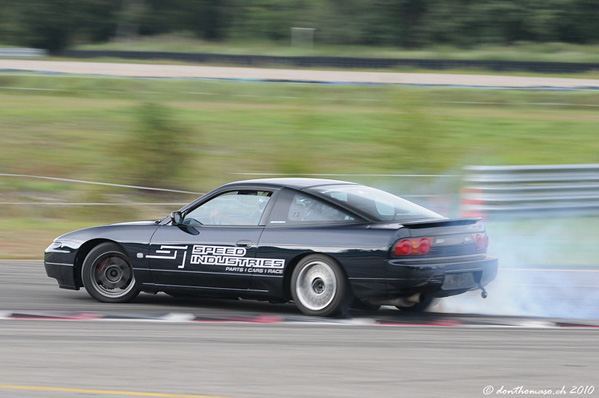
After a few days, weeks or months of practise and improvement, you will develop a strong need to upgrade to a real LSD. Sliding around the track with only one wheel spinning can be fun, but will annoy you sooner or later. But definitely not later than when your buddies make jokes and pick on you all the time about you being a „one-wheel-smoker“…
The following pic cleary shows the effect of the party pooper called „open diff“ or „non-VLSD“
Now you need to get one of those nice LSDs that are offered for the S-chassis cars on the market. This article does not aim to evaluate or compare the numerous LSDs aftermarket companies sell for the „S“, so let’s just stay on the „how-to“ topic. You basically just need to get one of those LSD kits that fit your requirements, a small workshop, a bit of wrenching experience and a nice friend to give you a hand.
We decided to go for the 2-way LSD kit, that KAAZ offers for the S13. Amazingly, all the necessary details are included, such as new bearings, cover gasket, gasket rings, diff oil. CAUTION: Make sure you order the correct diff kit for your „S“. The inner shafts for non-VLSD and VLSD are different. You need to specify this upon your order.
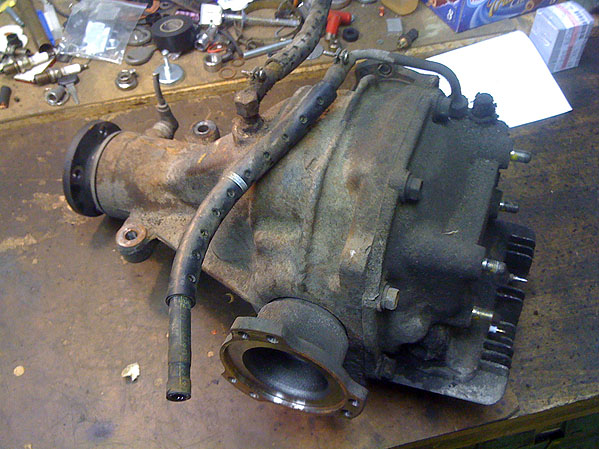
The diff comes out of the car quite handy. So you basically only need to detach the prop shaft, rear shafts, ABS (if existent) and sensor wires, oil radiator hoses and the four main bolts. It is a good idea to take the diff down together with your friend, since it is damn heavy.
The old buster on the bench, ready for its evolution:
Nissan equipped the differentials of its S-chassis cars with an awesome feature: A diff oil pump and radiator system, controlled by a temp switch and road speed signal of the ECU. It is actually a very wise idea to keep this stock setup, as especially when drifting, the oil can get reeeeally hot in there. Once the heavy bastard is out, check the working order of the oil pump. Connect the orange (or red) wire with the positive terminal of your battery to switch it on. I installed a switch in the cockpit, where you always can turn on and off the pump, e.g. if drifting.
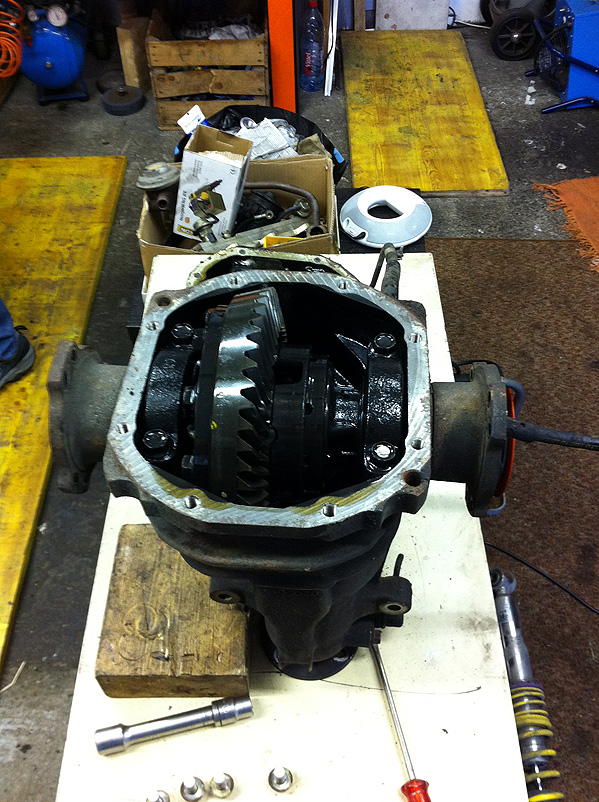
Ok, now remove the aluminium cover.
Next remove the two inner shafts from the diff. An internal spring holds them in place. You can lever them out with two big screwdrivers, make sure not to damage the cases. It is VERY IMPORTANT that you always keep the parts on their original side of the diff (left /right). NEVER EVER mess with this. Now you are ready to take off the two bearing shells that hold down the diff. There is an alignment ring on each side that you need to place exactly a the same position afterwards, so take care.
Now take out that old fucker and let it drain.
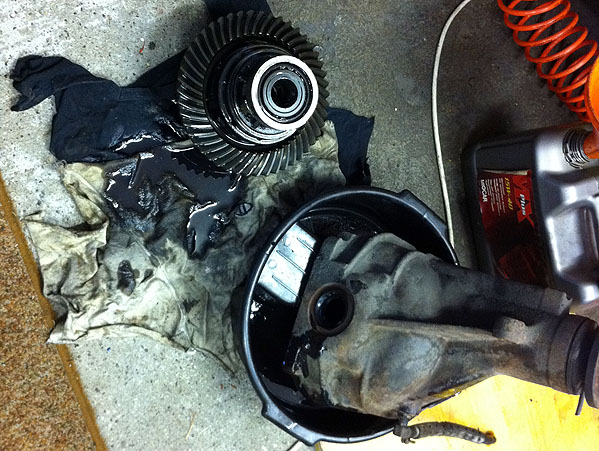
The ring gear now needs to be removed. Nissan does not tell you to replace the bolts there, but I did. In my opinion it is a small price for safety, because those seem to be extension bolts. And you don’t want one of them to come off, while your boostin’…
Take the new diff and mount the ring gear. The ring gear will sit very tightly on the diff, so you will want to heat the gear up a bit before you slide it onto the new diff, to make sure it sits properly. Now torque the new bolts to factory specs. It is recommended to use bolt lock (e.g. Loctite), to make sure they stay where they are.
The diff can now go back in the casing. Make sure you assemble everything the same way backwards, as you disassembled it. The R200 normally does not need to be aligned, I haven’t heard of any one who had problems. This is a nice thing, because it saves you alot of time.
Mount the cover with the new gasket and already fill it up with the new fluid. I also put on new oil hoses once the diff was out, they seemed to be quite brittle after 17 years. The diff is now ready to be installed back in the car. Don’t forget to follow the provided brake-in instructions and replace the diff fluid afterwards.
Always a good thing is to upgrade other parts of the rear, while things are apart anyways. I decided to remove the whole rear end and replace the old main rubber bushings with PU ones. If intense drifting is the purpose, it is also recommended to get a „4-arm-kit“ to adjust camber and toe. All the necessary parts and support are of course offered by Speed Industries, just send an email or give us a call.
… and this is the way the S13 performs with the proper LSD installed:
cheers – Chris